Mapping Unified Attributes
The Schema Mapping page displays all attributes from your input datasets, and allows you to map them to the attributes in the unified schema.
Creating a Unified Dataset
To create a unified dataset:
- Select the Schema Mapping page. The left side of the page displays all of the input attributes from each uploaded dataset. The right side provides a default name for the unified dataset in the format
[project name]_unified_dataset.
Tip: Tamr recommends that you use the default name. - (Optional) Edit the unified dataset's name in the text box.
Note: If you change the name of the unified dataset, avoid using special characters including the,(comma) character. - Choose Create Unified Dataset. The right side of the page changes to show that there are currently no unified attributes. Now, you can begin adding them and building your unified schema.
Naming Unified Attributes
Unified attributes must have names that conform to the following requirements:
- Names cannot contain the
.(period) character. - Names must be unique: they cannot match (case-insensitively) any other unified attribute in your project.
- Names cannot be empty, and cannot contain a leading or trailing spaces.
- Names cannot match (case-insensitively) the reserved, system-generated attribute names. See Understanding Tamr-Generated Data Attributes.
If you do use one of these names for an attribute, you receive the error message "This name is reserved by the system."
As a best practice, use a consistent style for your attribute names. For example, always use "camelCase" or "snake_case".
Renaming a Unified Attribute
Renaming a unified attribute early in the project workflow can result in fewer additional changes to align aspects of your unified dataset and project.
To rename a unified attribute:
- Navigate to the Unified Dataset page.
- Move your cursor over the unified attribute name, then select Edit
 .
. - Edit the attribute name and confirm your changes.
- Review the list of situations that require additional manual updates below, and complete all required updates.
- Rerun all project jobs to update the new attribute name throughout the project.
Note: Renaming a unified attribute in this way does not change project configurations, meaning manual updates are often required. See below.
When Renaming Requires Manual Updates
If the renamed attribute is referenced in any of the following, these additional manual changes are required:
- Transformations: You must update all transformations that include the renamed attribute in the project you are working in. You must manually update transformations on the Unified Dataset page to use the new name, before running the Update Unified Dataset job in this project.
- Transformations in other projects: You must update all transformations that include the renamed attribute in other projects, as well. Before you can update the text of the transformation, you must run the corresponding job (such as Update Unified Dataset or Publish Clusters) in the project that populates the referenced dataset.
Example: Say you renamed an attribute in Project A, and project_A_published_clusters is referenced in the transformations of project B (a join that used the renamed attribute). You need to run all steps of Project A, update the text of the transformations in Project B to use the new name, and then Update Unified Dataset in Project B. - Golden Records rules: You must manually update the rules of the project on the Rules page.
Note: Most golden records projects are built using the published output of a mastering project. In this case, you should not update the affected rules until after you run the Publish Clusters job in the project in which you first renamed the attribute. - Blocking Model: You must manually update the blocking model after running the Update Unified Dataset job, and before running the Estimate Pairs or Generate Pairs jobs.
- If you are using any features that are in limited release, there may be additional locations where you need to update the unified attribute name. Please contact Tamr Support for guidance on renaming attributes in limited release features.
Creating a Unified Attribute
You can create unified attributes manually, or use the "bootstrap" feature to create unified attributes from specified input attributes.
To create a unified attribute manually:
- On the right side of the Schema Mapping page select Create.
- Enter a unique identifying name. See Naming Unified Attributes.
- (Optional) Enter a description for the attribute.
- Select Create.
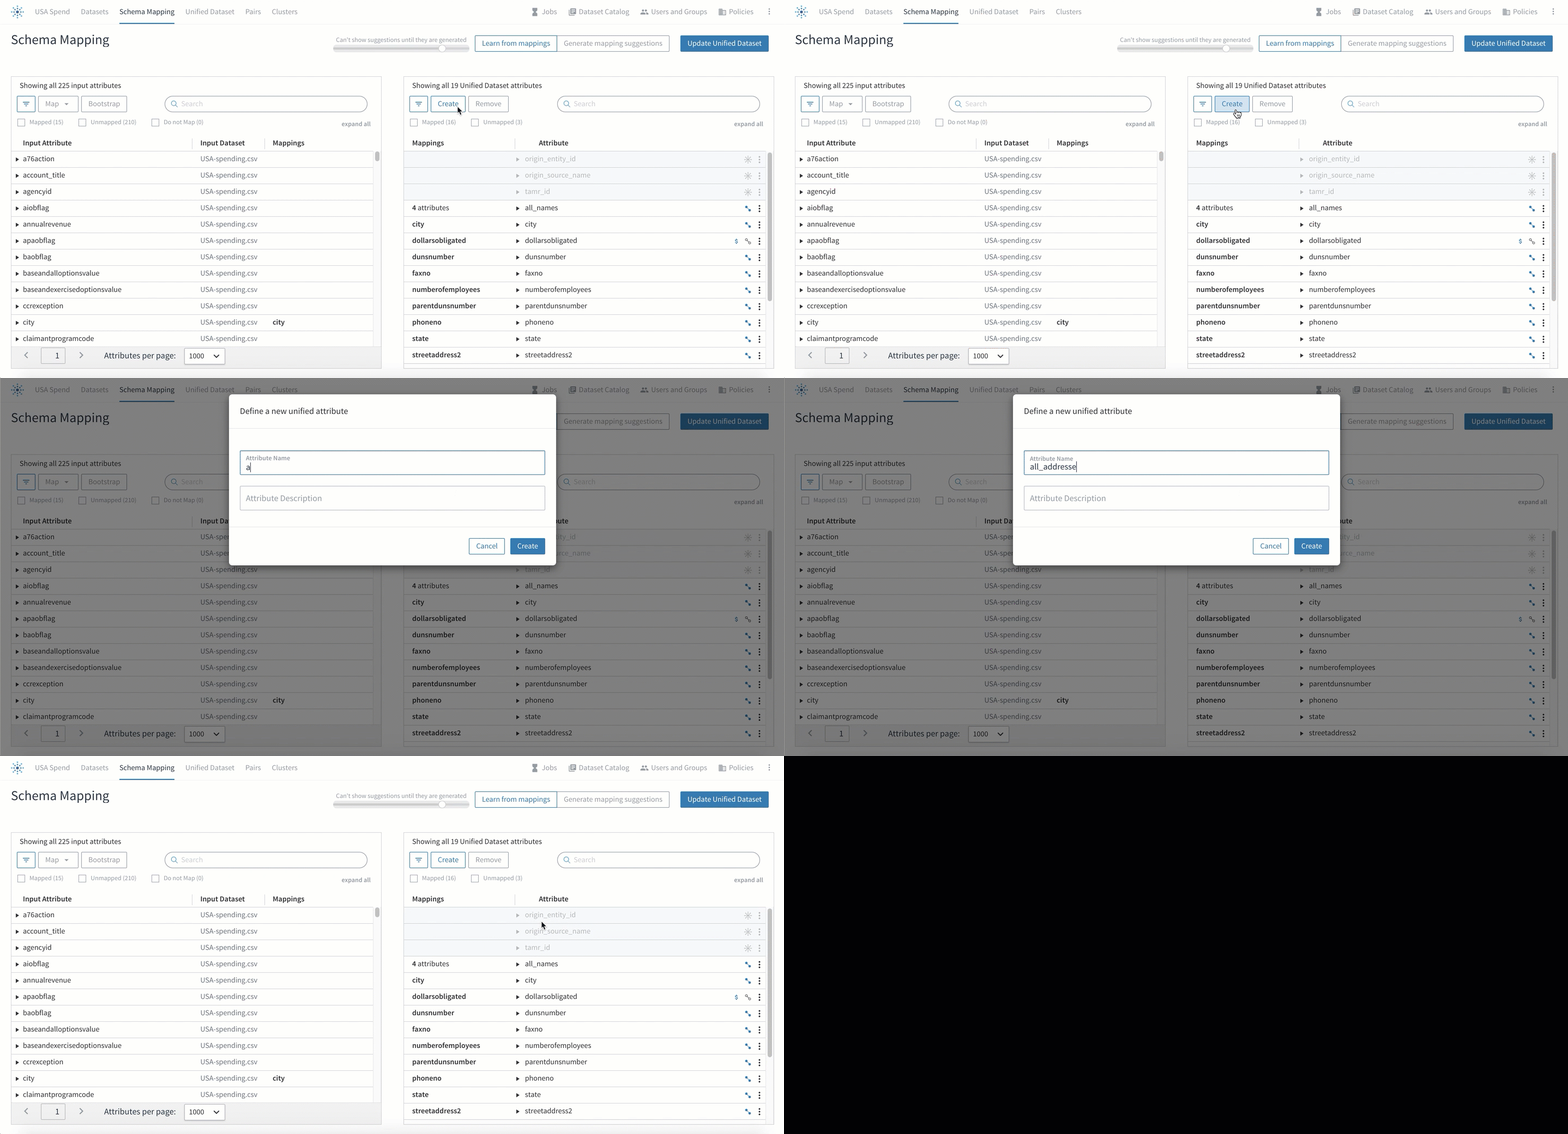
Creating a unified attribute.
To bootstrap unified attributes from input attributes:
- On the left side of the Schema Mapping page, use Ctrl+Select or Cmd+Select to select one or more unmapped attributes.
- Choose Bootstrap. Tamr Core launches the attribute bootstrapping process to create unified attributes and map the selected input attributes to them. See Approaches to Creating a Unified Schema.
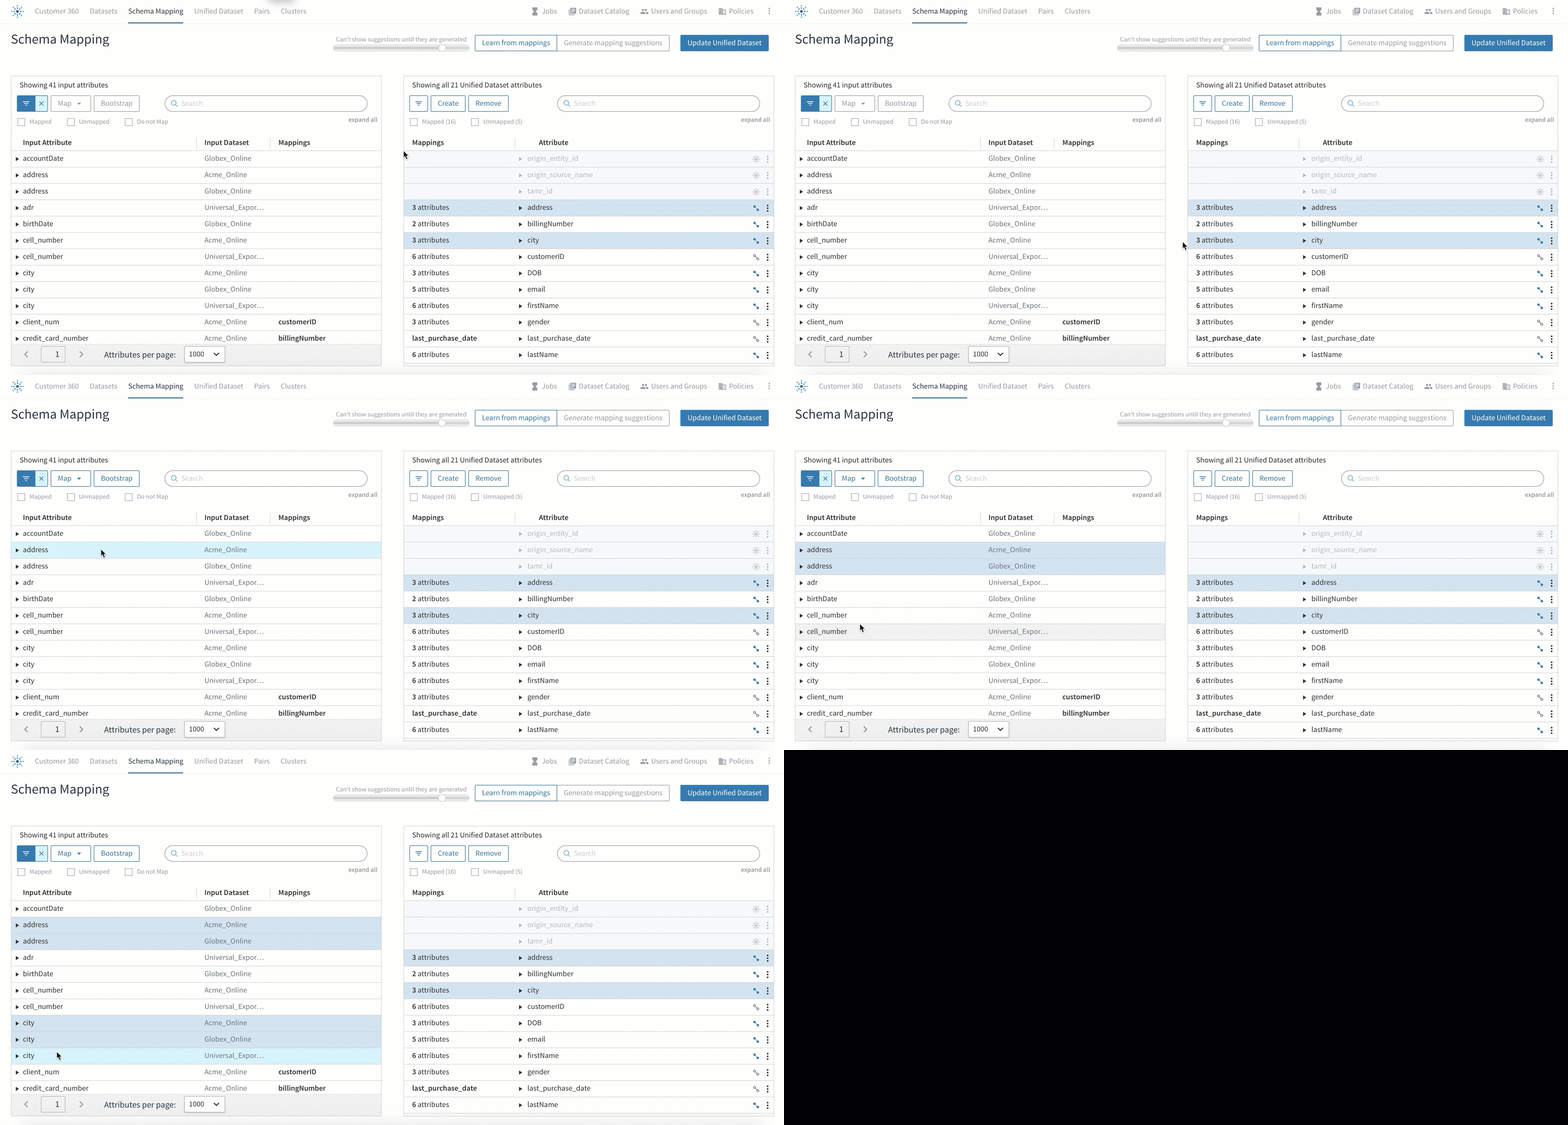
Bootstrapping attributes.
Mapping Attributes Manually
After you create unified attributes you can map input attributes to them one at a time by dragging them onto the desired unified attribute.
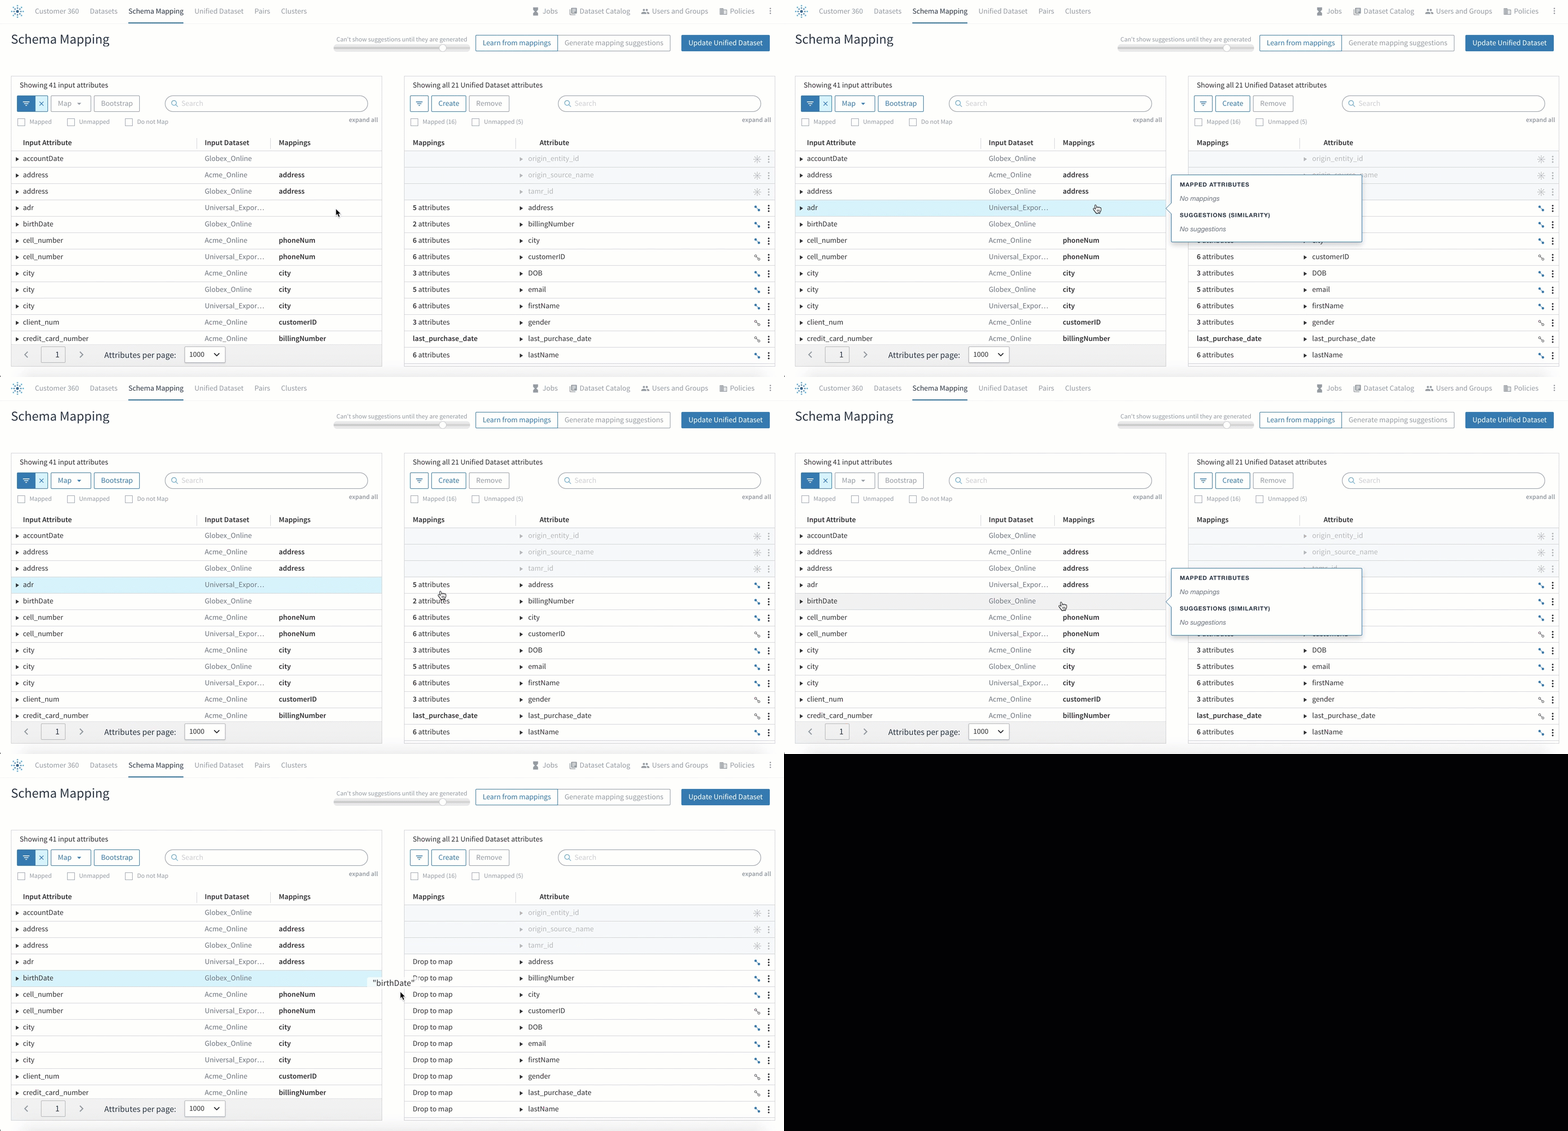
Mapping attributes using drag and drop.
Tip: Use the Unmapped checkbox at the top of the list of input attributes to show only unmapped attributes.
You can map multiple input attributes by using Ctrl+Select (Cmd+Select) or Shift+Select.
If there is an input attribute that you choose not to map, select it and then choose Do not map from the Map dropdown menu.
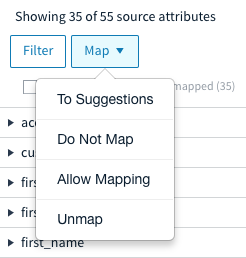
Mapping options for input attributes.
After you map a few attributes manually, you can leverage the machine learning model to suggest additional attribute mappings.
Changing the Input Attributes Mapped to a Unified Attribute
If an input attribute is incorrectly mapped to a unified attribute, move your cursor over the count of attributes in the Mappings column for the unified attribute to see a list of mapped input attributes. Find the incorrectly mapped attribute in the list and select Unmap.
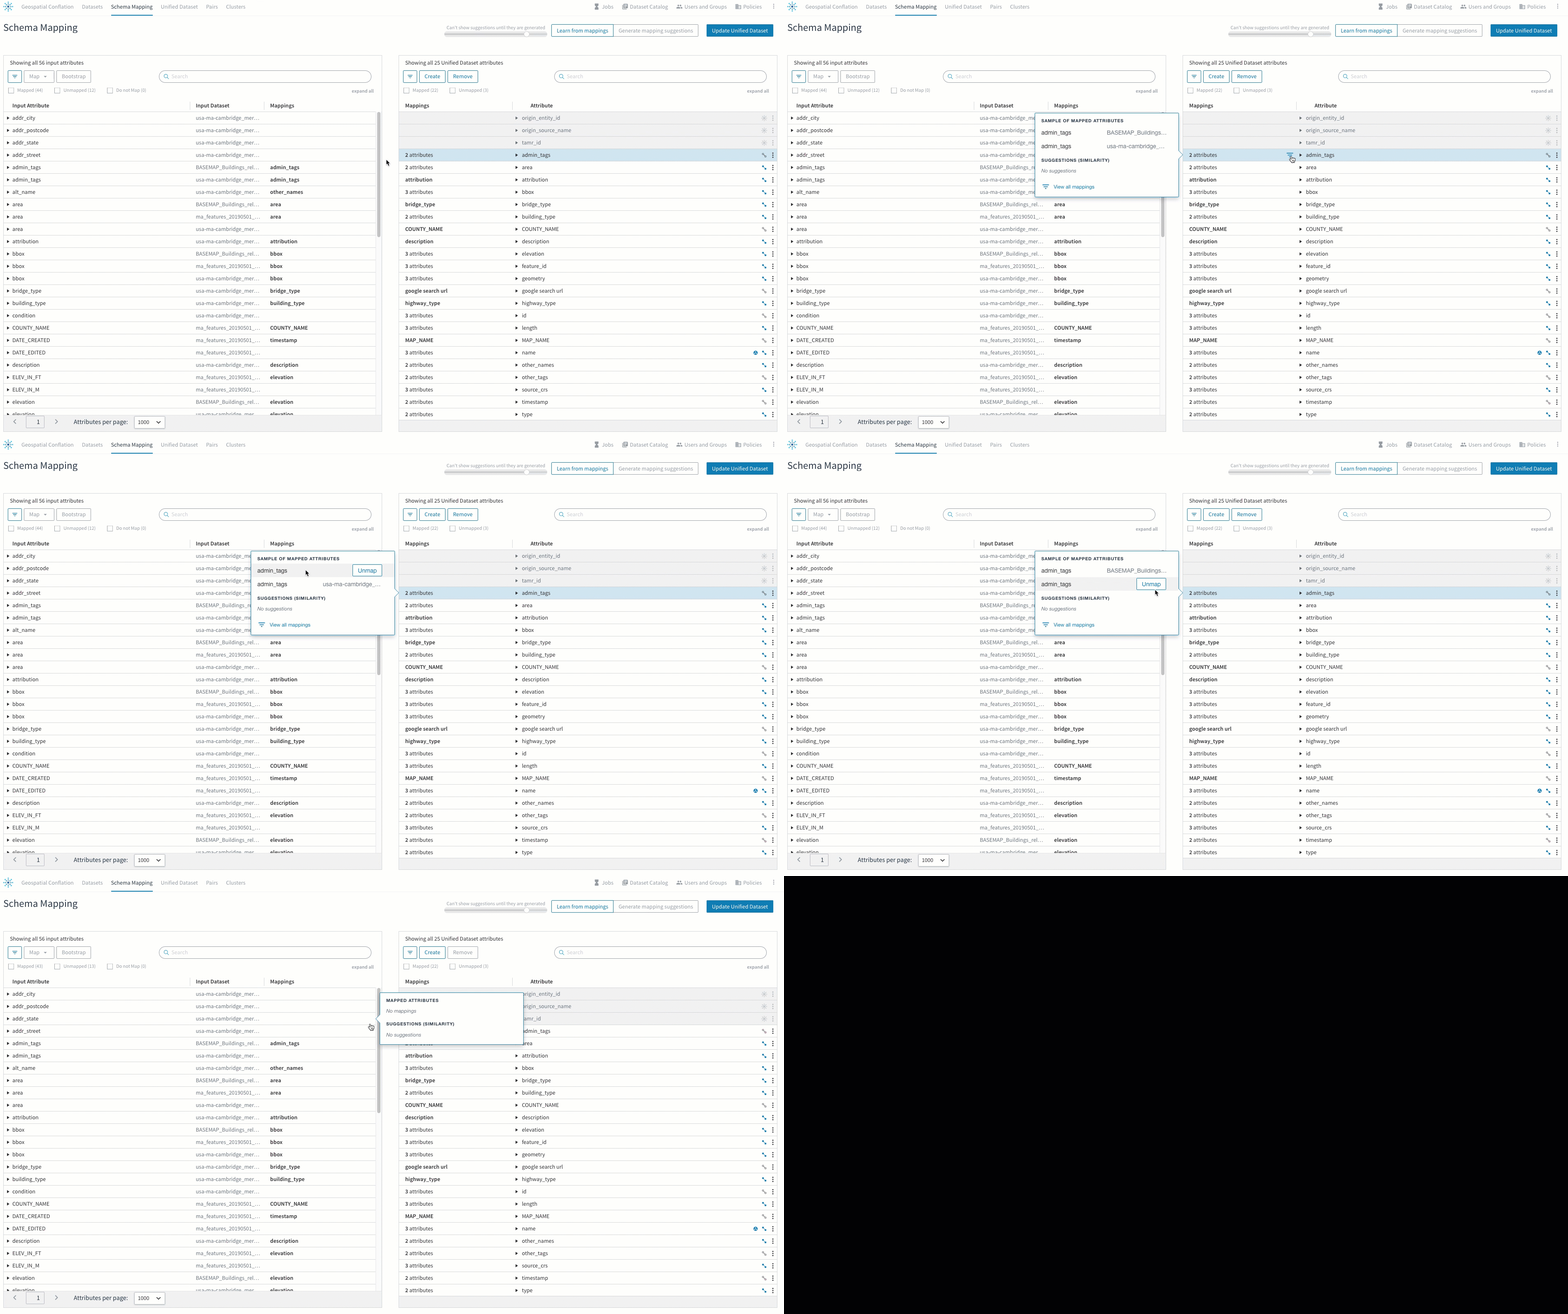
Unmapping a source attribute from a unified attribute.
You can also unmap input attributes from the Mappings column in the left side. Move your cursor over the name of the unified attribute to show a popup. Within the popup, move your cursor over the name of the unified attribute to reveal the Unmap option.

Unmapping an input attribute.
Filtering to Mapped Attributes
You can filter to the set of source attributes that are mapped to a unified attribute. Move your cursor over the name of the unified attribute to show a popup. Within the popup, select View all mappings.
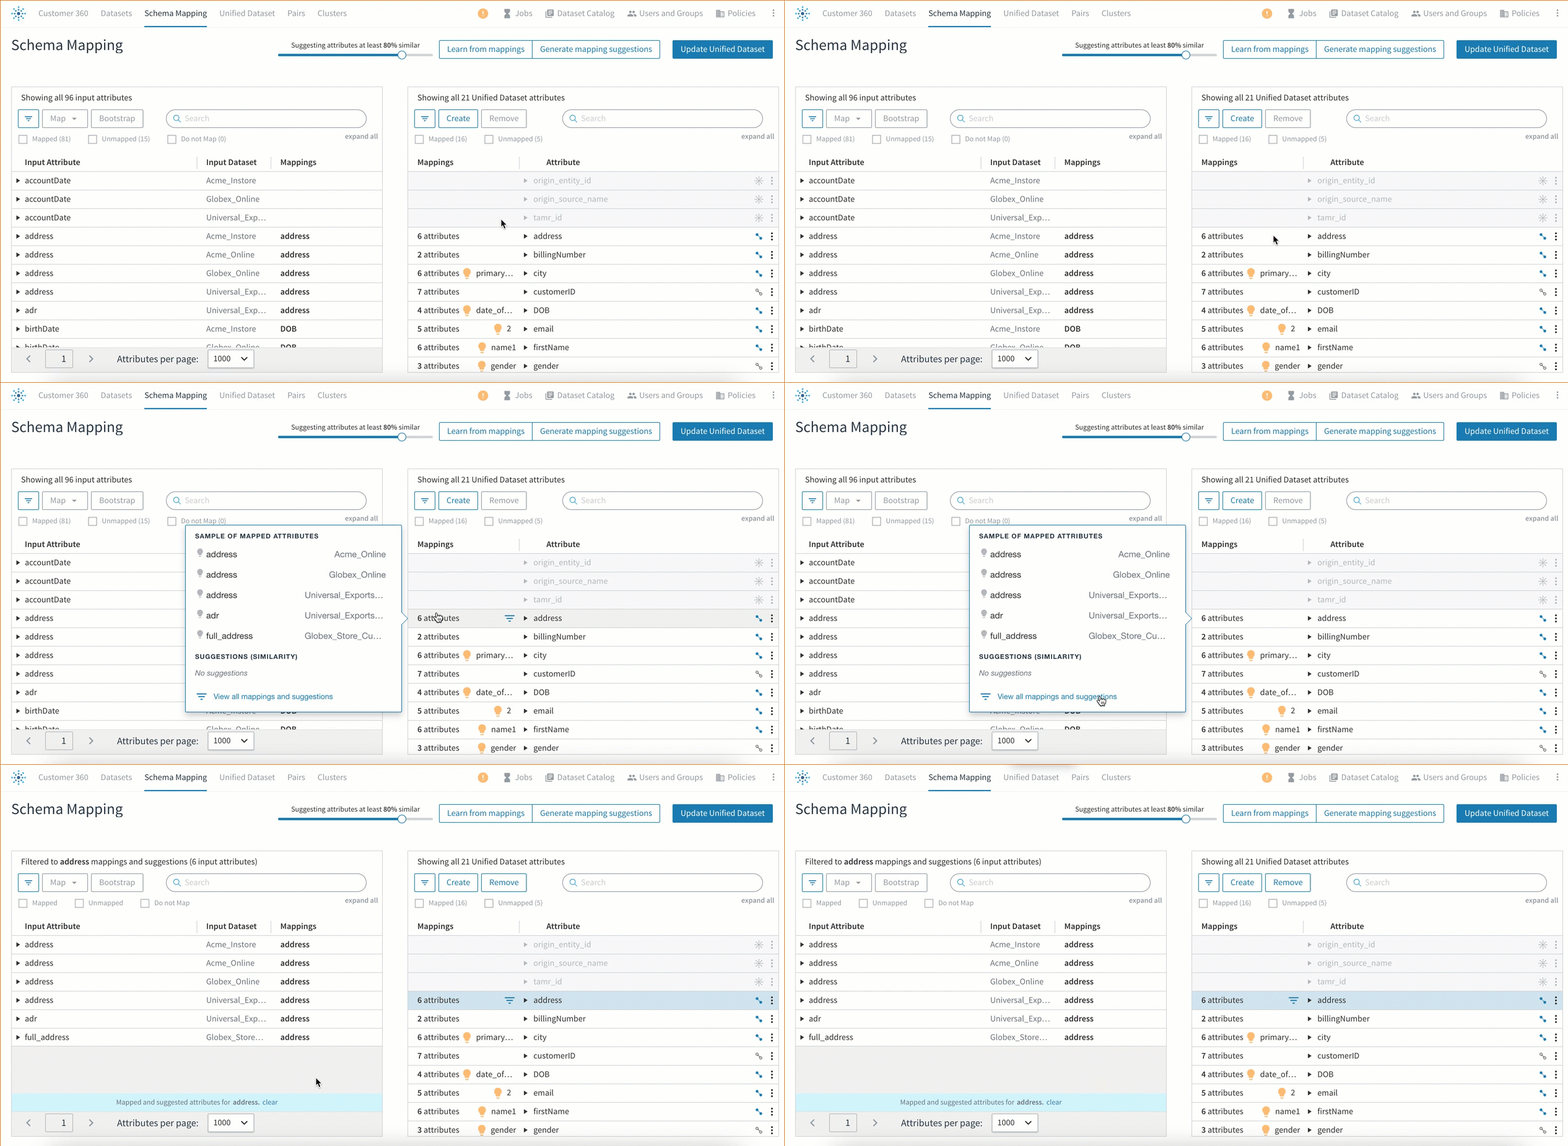
Filtering to mapped source attributes.
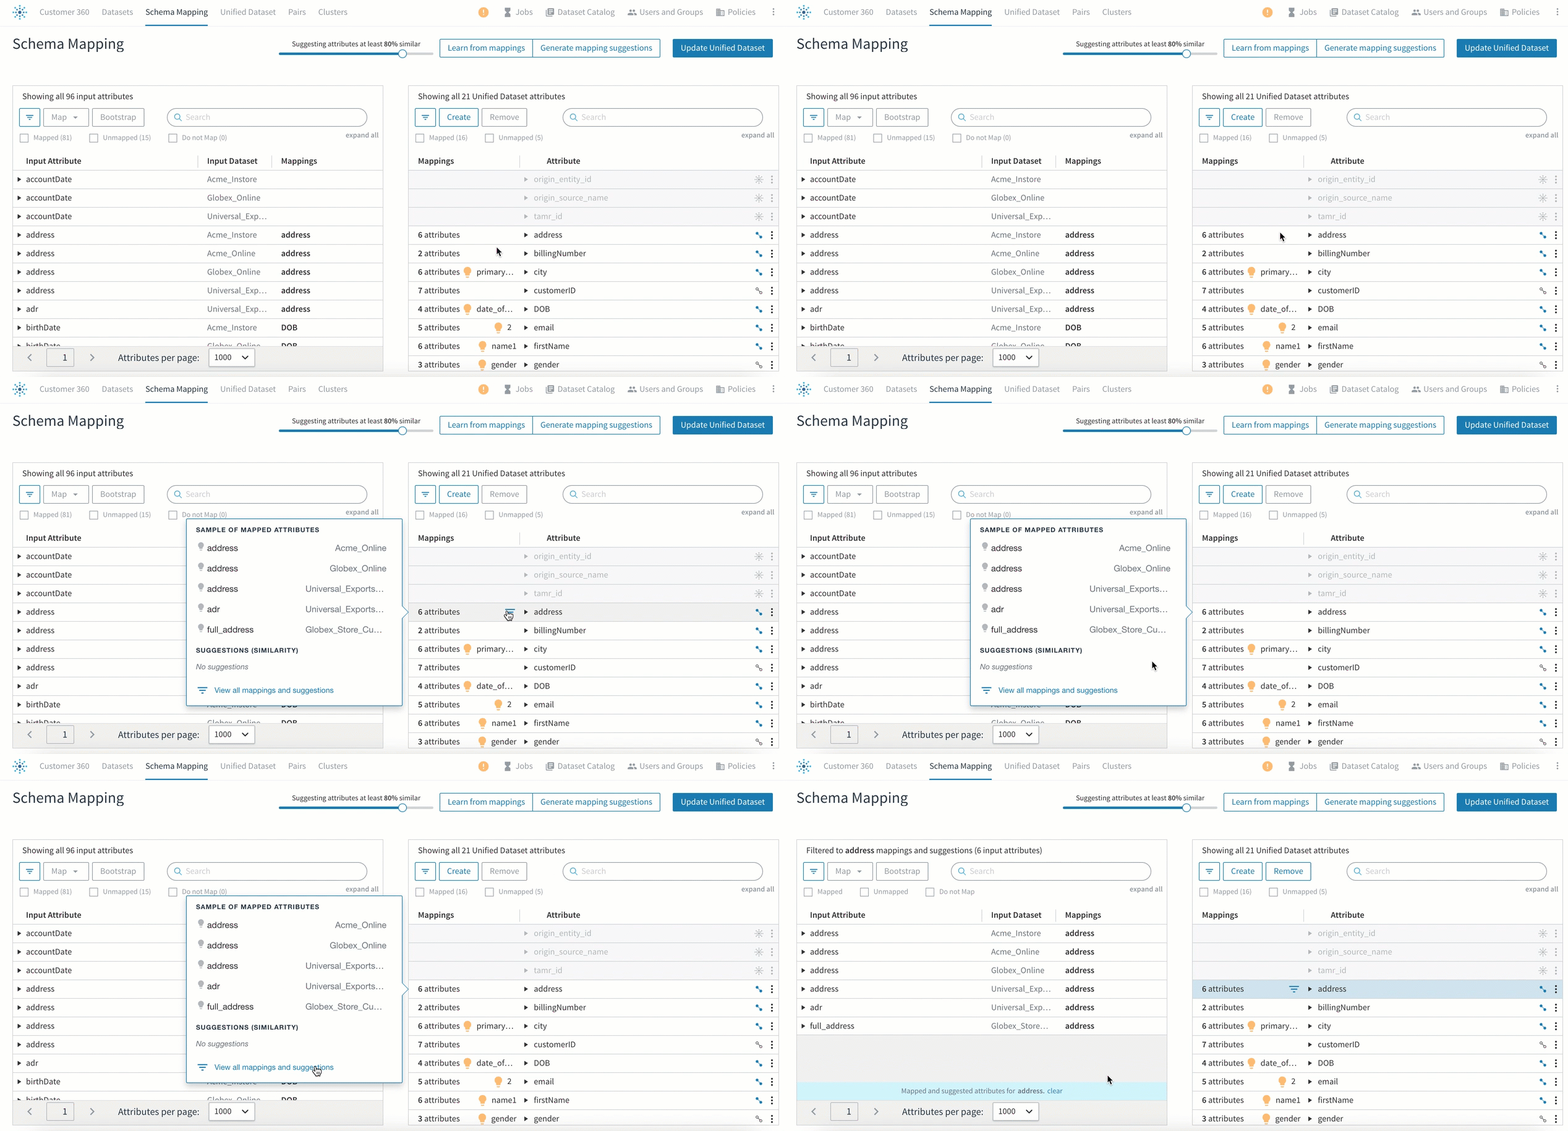
Filtering to mapped source attributes.
Changing How a Unified Attribute Is Sorted
When you view unified data in tables on subsequent pages of the project, you can sort records by attribute value. By default, Tamr Core assigns a sort value of alphabetical to every unified attribute.
To change the sort value, to the right of the unified attribute, choose More ![]() and then choose Alphabetically or Numerically.
and then choose Alphabetically or Numerically.
Deleting a Unified Attribute
To delete a unified attribute, select it and choose Remove.
Updating a Unified Dataset
To save your work and apply your changes and additions, you update the unified dataset.
To update a unified dataset:
- Navigate to the Schema Mapping page.
- Choose Update Unified Dataset.
Updated over 2 years ago