Overview
Transformations are tools that affect the final output of a unified dataset, replacing the effort of individually transforming each input dataset before you upload them into a project.
You can apply transformations to all records in the unified dataset, or to records from specific input datasets. As a best practice, Tamr recommends that you apply transformations to the unified dataset whenever possible.
- Applying transformations to the unified dataset is, in most cases, more efficient than applying them to the input datasets, so processing completes faster.
- You can use the system-generated
origin_source_nameattribute to apply transformations to specific input datasets, even when they are run on the unified dataset. For example, you can use acaseexpression that checks the value oforigin_source_namebefore applying a data cleaning transformation. Alternatively, you can useorigin_source_nameas part of the condition of aJOINstatement to apply theJOINto a subset of input datasets. See Managing Primary Keys and Join.
Transformations operate at a project level and produce a single output dataset based on one or more input datasets. Transformations never change input datasets.
Adding a Transformation
You can add transformations to schema mapping, categorization, and mastering projects. See Enabling Transformations in Categorization and Mastering projects.
To add a transformation:
- On the Unified Dataset page, select Show Transformations. The transformation panel appears with drop-down menus for adding transformations.
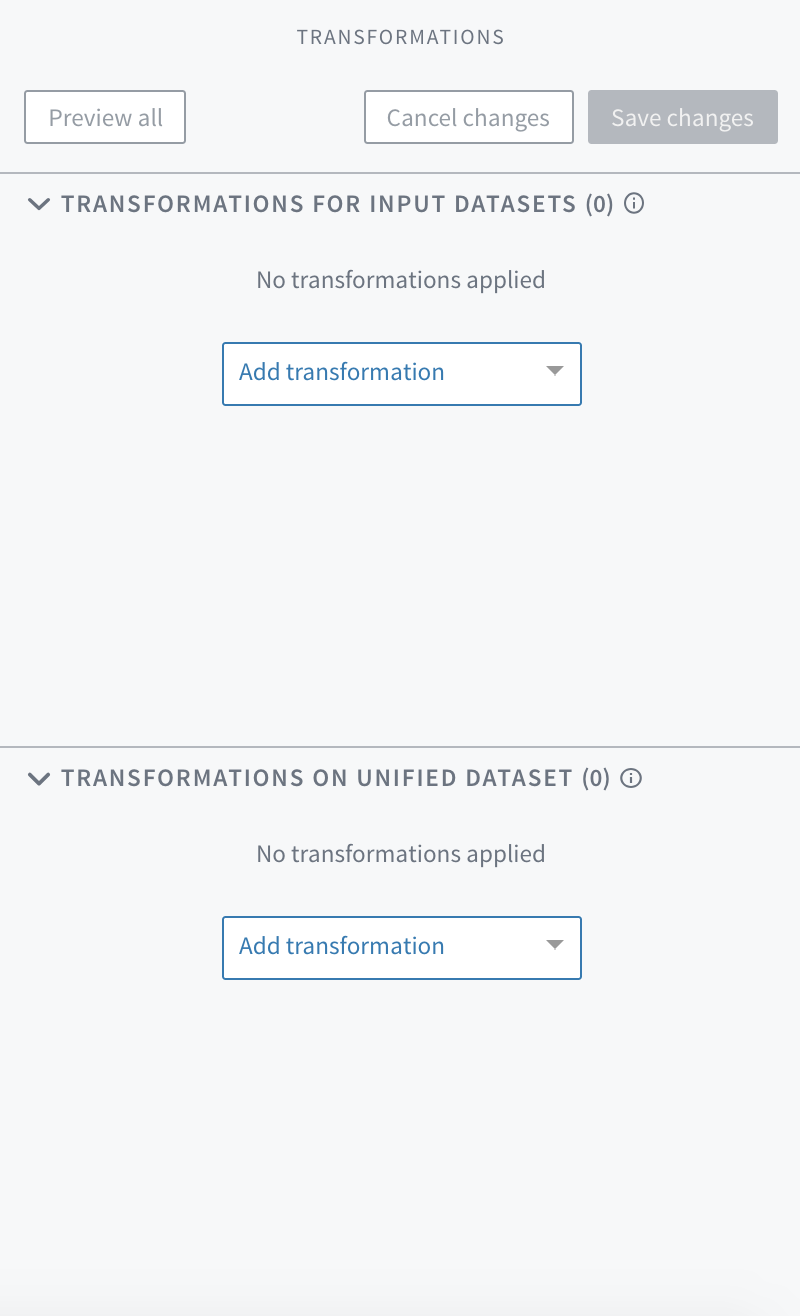
The transformation panel on the Unified Dataset page.
- In the Transformations on Unified Datasets section choose Add Transformation. An editing dialog, the transformation editor, opens within the transformation panel. The topics in this guide provide examples of the scripts and other options that you can use to write transformations.
If you add a transformation to the Transformations for Input Datasets section, the message "For records from datasets" appears in the bottom left corner of the transformation panel. Select this message to specify the datasets affected by this transformation. By default, the transformation is applied to all input datasets.
Tip: You can add a transformation between other, previously added transformations. Move your cursor between two existing transformation editor boxes and select Add transformation.
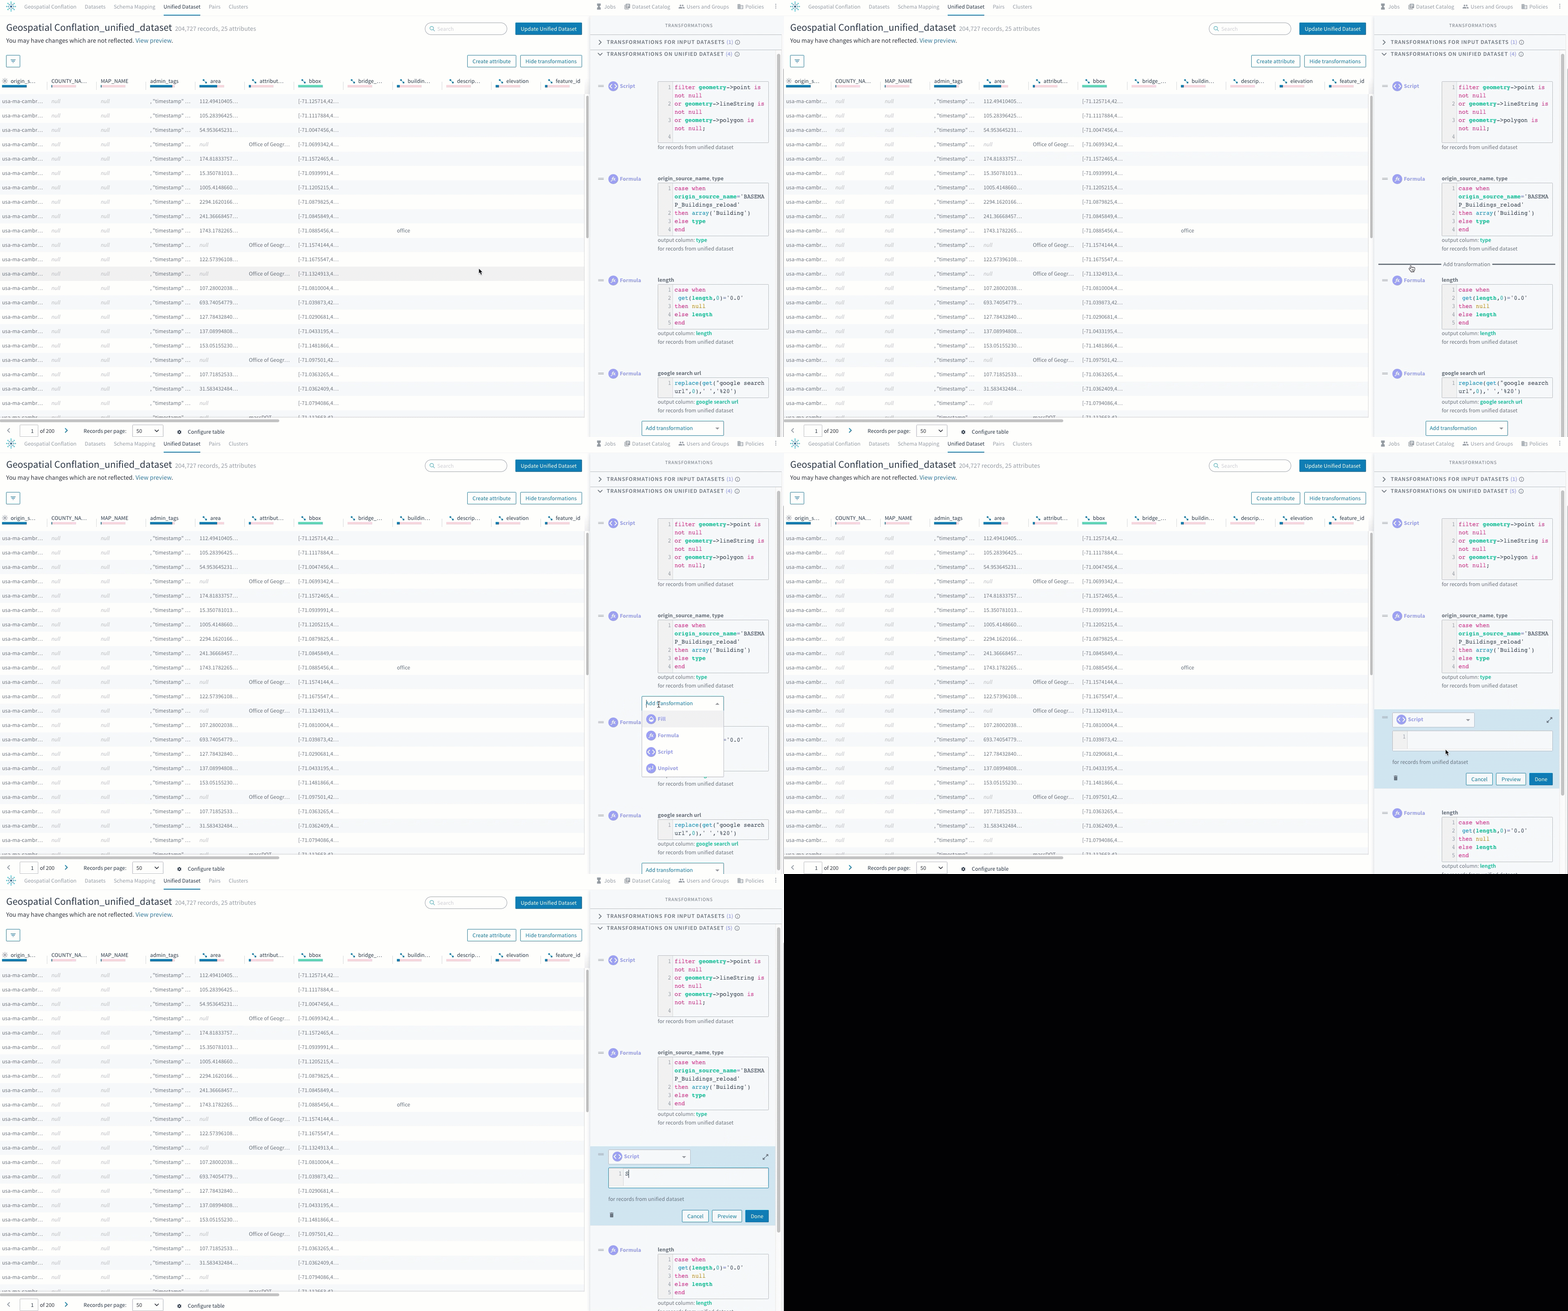
Adding a transformation between existing transformations.
- To change the scope of a transformation from the input datasets to the unified dataset or vice versa, open both sections in the transformation editor and drag the transformation between the sections.
Previewing and Saving Transformations
After you write one or more transformations, you can use Preview all at the top of the transformations panel to see the results of all transformations on a sample dataset. This option allows you to test transformations without affecting the entire dataset. You can iterate and improve your transformations quickly, viewing the results as you go before saving any changes.
If a transformation has syntax errors, a message appears. See Tips for Troubleshooting Transformations.
Tip: An error message appears when the preview service attempts to transform data into an array of arrays. To preview data of this type, after the transformation that results in an array of arrays add another transformation to convert the data to a simpler type.
When you are satisfied with the results of your transformations, save your changes. At the top of the transformations panel, a counter appears above Save changes to indicate how many changes you have made. If you navigate away from this page before you save your changes, they are deleted. The Save changes button is disabled until you make a valid change.

The Save changes control with a change count of 2.
To revert all unsaved changes and return to the last saved version of all transformations, choose Cancel changes. This deletes all unsaved changes.
You can also preview the effect of a specific transformation by selecting Preview in its editing dialog. Subsequent transformations are grayed out to signify that they are not included in the preview, although you can still edit and reorder them. To save changes, select Save changes. This saves all changes, not only those made to the transformations you have previewed.
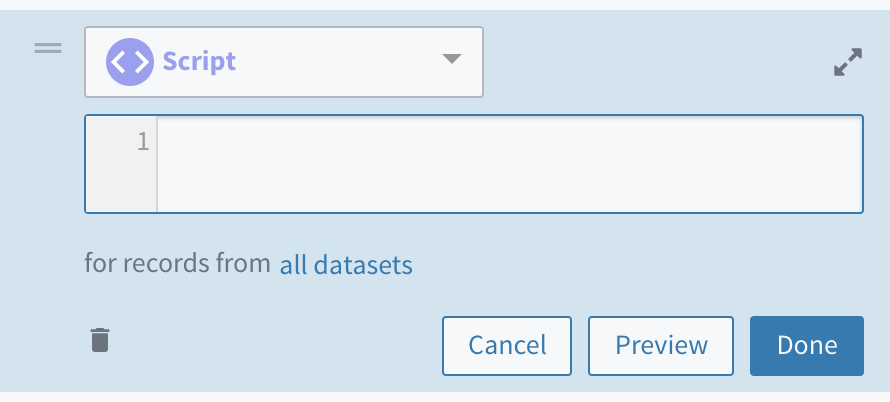
The Preview option in a transformation's editing dialog.
You can also see a preview of your data before any of your transformations are applied. At the top of the Input Datasets section choose Preview .

The Preview without any transformations option at the top of the Transformations for Input Datasets section.
Reordering Transformations
Projects apply transformations in the order that they appear in the transformations panel. You can reorder them at any time. Reordering can change the output.
To reorder transformations, at the top left of the transformation editor select and hold Handle ![]() and then drag it to the desired location within the transformations panel.
and then drag it to the desired location within the transformations panel.
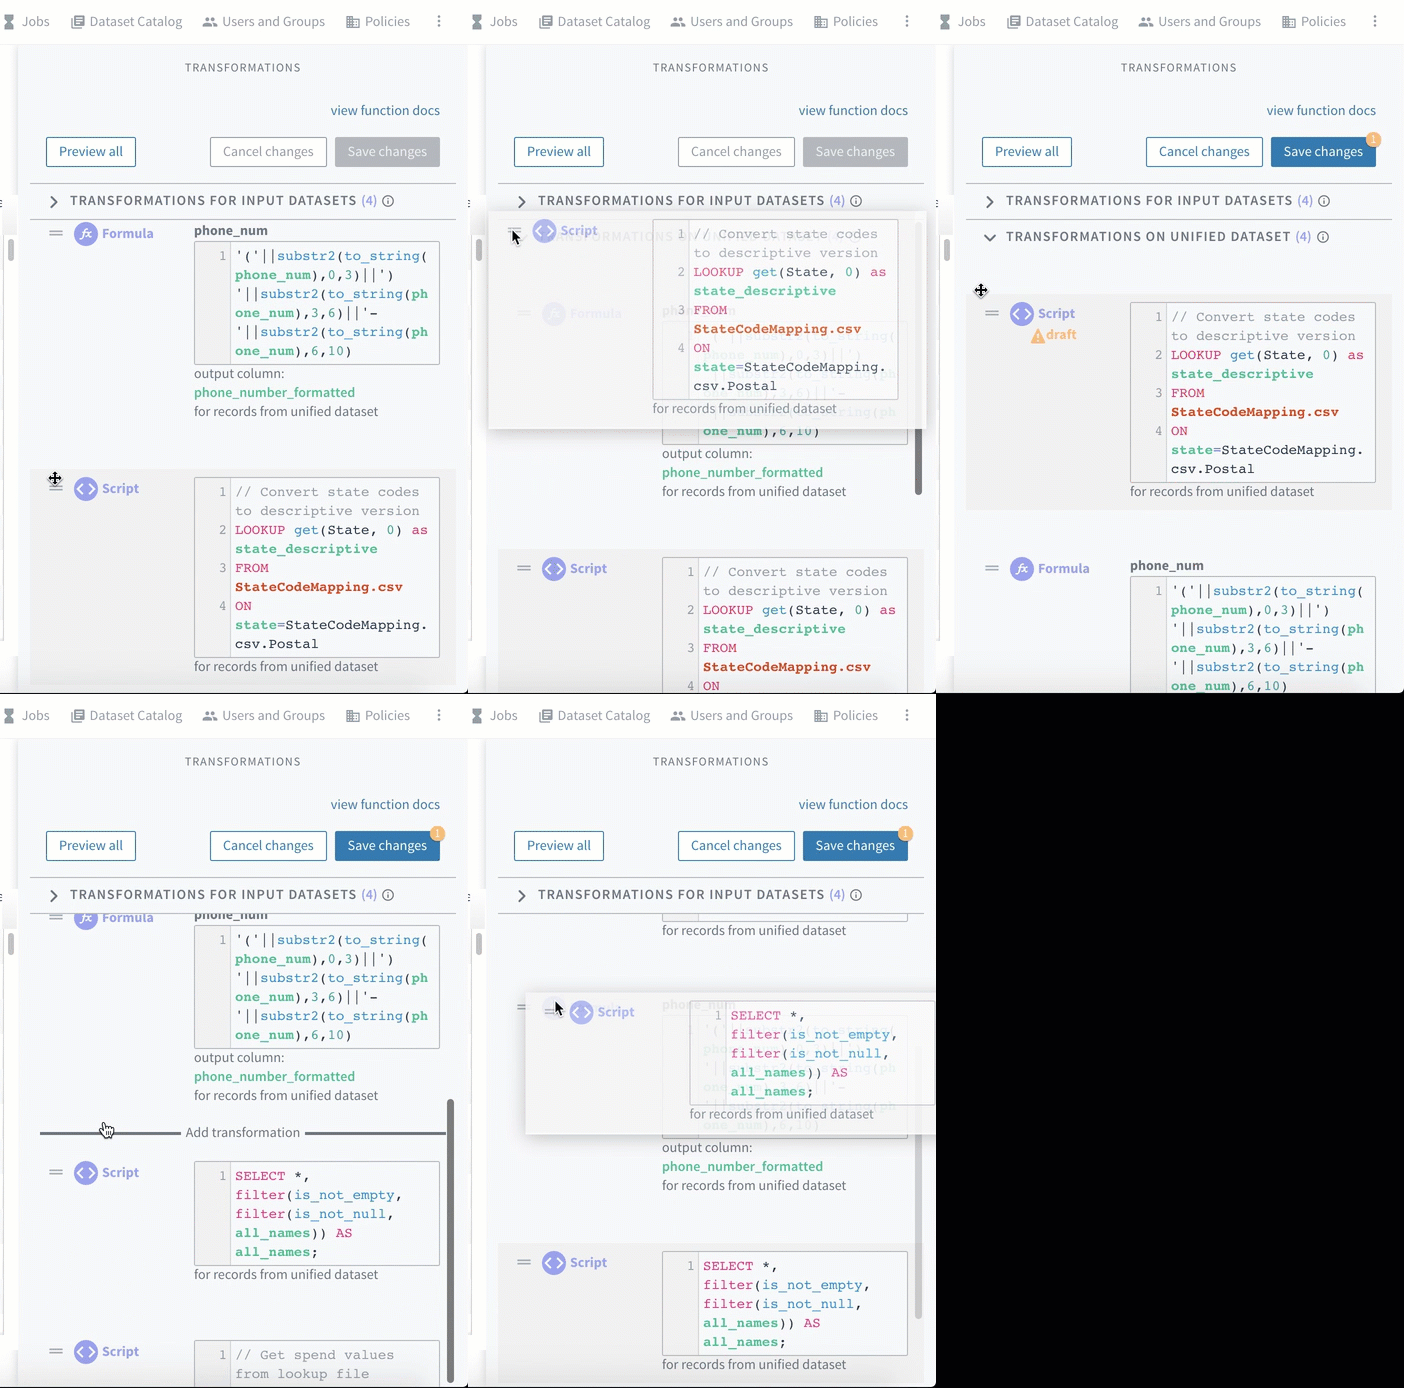
Reordering transformations with drag and drop.
Applying Transformations
The Save changes button on the transformation panel keeps your work in case you navigate away or want to come back to it later.
To apply transformations so that they become part of the data pipeline for your unified dataset, a curator or admin must choose Update Unified Dataset on the Unified Dataset or Schema Mapping page. This applies transformations to the unified dataset.
Removing a Transformation
To remove a transformation:
- Select the transformation's editing dialog. Options for working with the transformation appear.
- Select Delete
 . A confirmation message appears.
 - Select Remove.
- When you are ready to commit this action, Save changes.
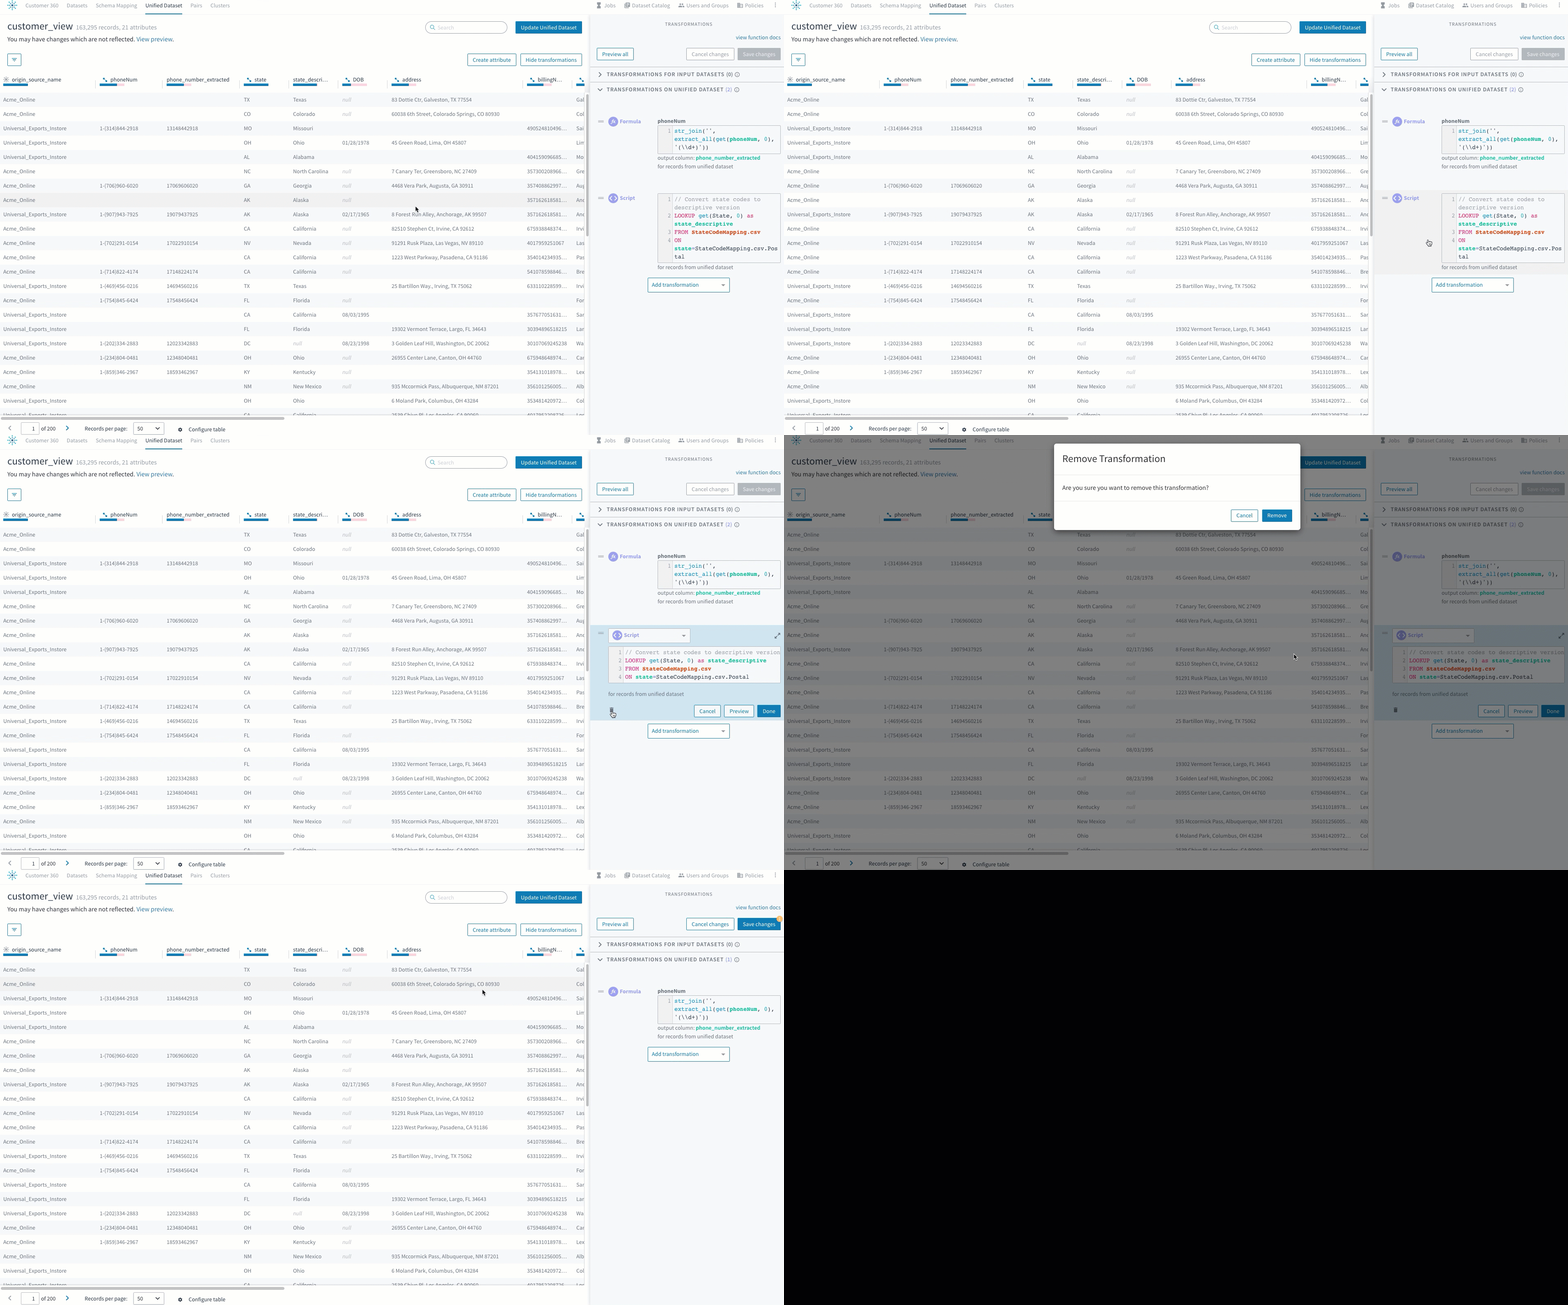
Removing a transformation.
Making System-Wide Changes to a Transformation
If a change, such as a company-wide policy or a new software release, affects a transformation that is used in multiple projects, a system administrator can use a utility script to update that transformation across all projects. See Transformation Tools.
Data Types
Transformations support multiple data types. See Data Types and Transformations.
Enabling Transformations in Categorization and Mastering Projects
Important: If you are writing transformations in a categorization or mastering project, or plan to use a unified dataset that contains transformations in a second project, the system-generated attributes
origin_source_nameandorigin_entity_idmust meet certain conditions. Transformations can be used to maintain these conditions:
origin_source_namemust be a string type. Each string should be a name of one of the input datasets.origin_entity_idmust be a string type.tamr_idmust be a unique string type, since it is a system-generated primary key.
See Managing Primary Keys.
To include transformations to a mastering or categorization project:
An admin can enable transformations in categorization and mastering projects when creating the project.
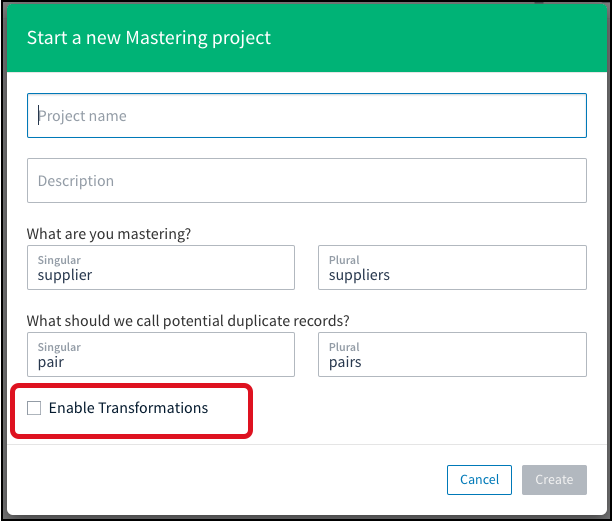
In this example for a new mastering project, check Enable Transformations to include this feature.
If you decide to include transformations in an existing project, a curator or admin can edit it: locate the project on the Tamr Core dashboard, move your cursor over the top right corner to choose Edit ![]() . The same dialog opens so that you can select Enable Transformations.
. The same dialog opens so that you can select Enable Transformations.

To change an existing project, select Edit.
Once enabled, transformations cannot be disabled in a project.
Additional Information
Functions List
For a full list of all supported functions, see Functions. You can also get transformation help in-product.
Metadata for Input Datasets
You can set metadata values for an input dataset or any of its attributes in a mastering, categorization, or schema mapping project. You can then use the metadata in transformations.
For more information, see Using Metadata in Transformations.
Referencing Attributes
To reference attributes in a transformation script, wrap them in double quotes, although this is not required (attribute and "attribute" both work). You may reference an attribute without using any quotes, however, any attribute containing spaces or escaped characters must be wrapped in double quotes. An attribute name containing double quotes itself can be referenced by escaping the double quotes. For example, this is an "attribute name" becomes "this is an ""attribute name""".
Attributes in transformations are case sensitive.
Referencing Datasets
Dataset names follow the same pattern as attributes. Wrap dataset names in double quotes if they include spaces or escaped characters, such as USE "myData.csv"; or USE my_data;. See Referencing Other Datasets, or see join for an example referencing an input dataset.
Using Single Quotes
Single quotes are interpreted as string literals 'string'.
Tab Autocomplete
For transformations such as script and formula, pressing the tab key provides a list of suggested inputs, including functions and attributes.
Hints autocomplete with tab in the transformation editor.
Updated over 2 years ago